
This lesson is made with PSPX9
But is good with other versions.
© by SvC-Design

Materialen Download :
Here
******************************************************************
Materials:
PALETTE COULEURS VERSION 2.png
DECO PERSO 1 206 FEVRIER 2024 SWEETY.png
DECO PERSO 2 206 FEVRIER 2024 SWEETY.png
SIGNATURE TUTORIELS .pspimage
SELECTION 1 206 .PspSelection
SELECTION 2 206 .PspSelection
SELECTION 2 BIS 206 .PspSelection
SELECTION 3 206 .PspSelection
SELECTION 4 206 .PspSelection
SELECTION 5 206 .PspSelection
SELECTION 6 206 .PspSelection
1899-advertisement-crooked-lighthouse-saloon-air-brush-smooth-mysterious-317953207.jpg
FEVRIER 2024 TANIA 10 02 24 SWEETY.png
MARS 2024 GROUPE DE MOUETTES 09 03 24 SWEETY.png
******************************************************************
Plugin:
Effects – plugin - Filters Unlimited 2.0 - &<Bkg Designer sf10 III - Texture Raw Canvas
Effects – plugin - Carolaine And Sensibility - CS Texture
Effects– plugin - MuRa’s Meister - Perspective tiling
******************************************************************
color palette
:

******************************************************************
methode
When using other tubes and colors, the mixing mode and / or layer coverage may differ
******************************************************************
General Preparations:
First install your filters for your PSP!
Masks: Save to your mask folder in PSP, unless noted otherwise
Texture & Pattern: Save to your Texture Folder in PSP
Selections: Save to your folder Selections in PSP
Open your tubes in PSP
******************************************************************
We will start - Have fun!
Remember to save your work on a regular basis
******************************************************************
Foreground (AVP):
Background (ARP):
Color 3:
1.
Open a new transparent image of 950/600 px
Selections - select all
Open 1899-advertisement-crooked-lighthouse-saloon-air-brush-smooth-mysterious-317953207.jpg
Edit - copy
Activate your work
Edit - paste into selection
Selections - select none
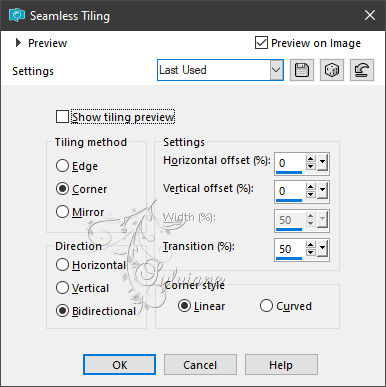
Effects - Image Effects - Seamless Tiling
Adjust - blur - gaussian blur
Range: 23
2.
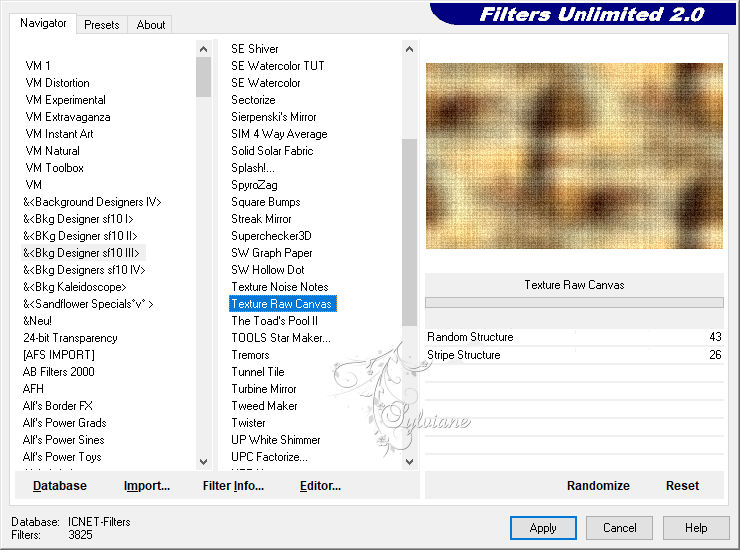
Effects – plugin - Filters Unlimited 2.0 - &<Bkg Designer sf10 III - Texture Raw Canvas:
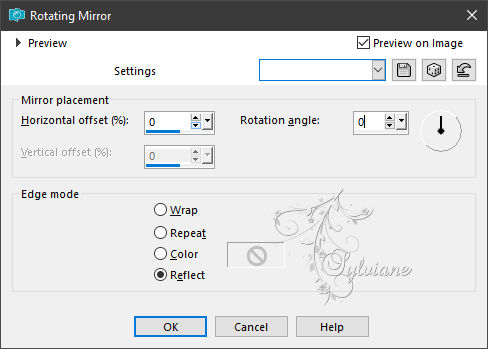
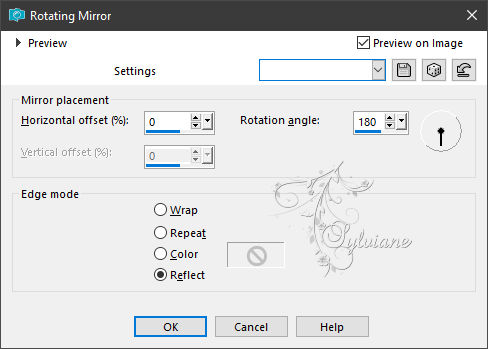
Effects – reflection effects – rotating mirror
Selections - select all
Layers - New Raster Layer
Open DECO PERSO 1 206 FEVRIER 2024 SWEETY.png
Edit - copy
Activate your work
Edit - paste into selection
Selections - select none
Layer mode of your choice OR to color it in your tones:
Color changer tool then click on the deco with your AVP or ARP color
3.
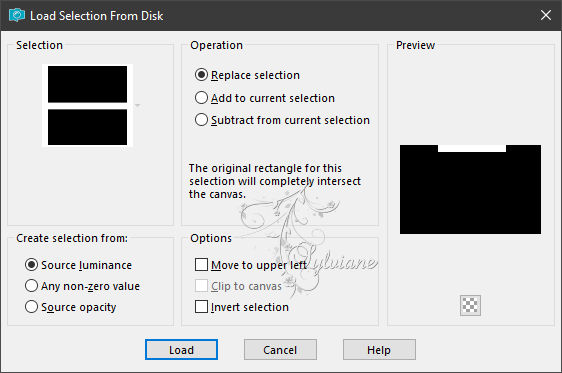
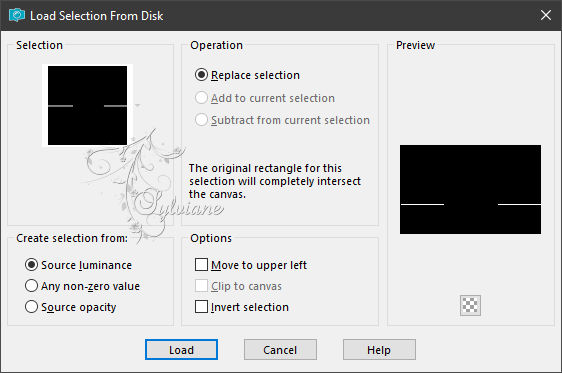
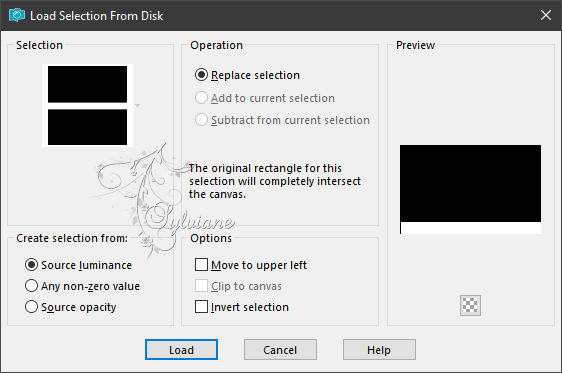
Selections - Load / Save - Load selection from disk - SELECTION 1 206 .PspSelection
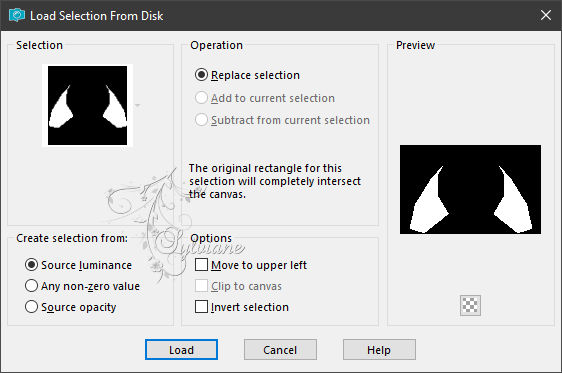
Ativate (Raster 1)
Selections – Promote selections to layer
put your background in dark color
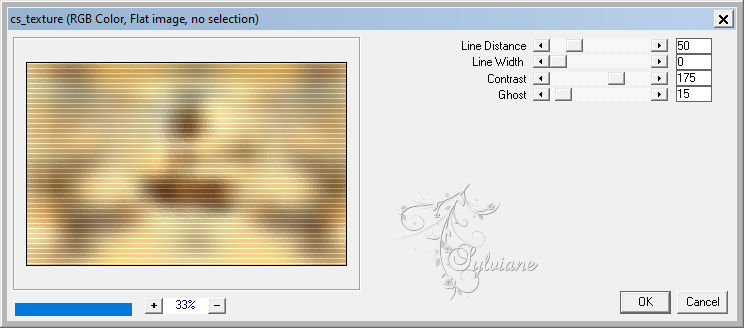
Effects – plugin - Carolaine And Sensibility - CS Texture

Effects – reflection effects – rotating mirror
Selection - Select None
4.
At the moment we have this:
Activate Raster 2
Selections - Load / Save - Load selection from disk - SELECTION 2 206 .PspSelection

Fill the selection with the color AVP or ARP
Selections - Load / Save - Load selection from disk - SELECTION 2 BIS 206 .PspSelection
(This will cancel the previous selection)
Erase OR Delete on keyboard.
Selection - Select None
5.
Activate Raster 1
Activate Selection - Custom selection
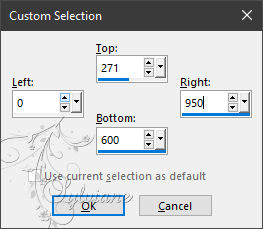
Erase OR Delete on keyboard.
Selection - Select None
Layers - Duplicate
Image - Mirror - Vertical Mirror
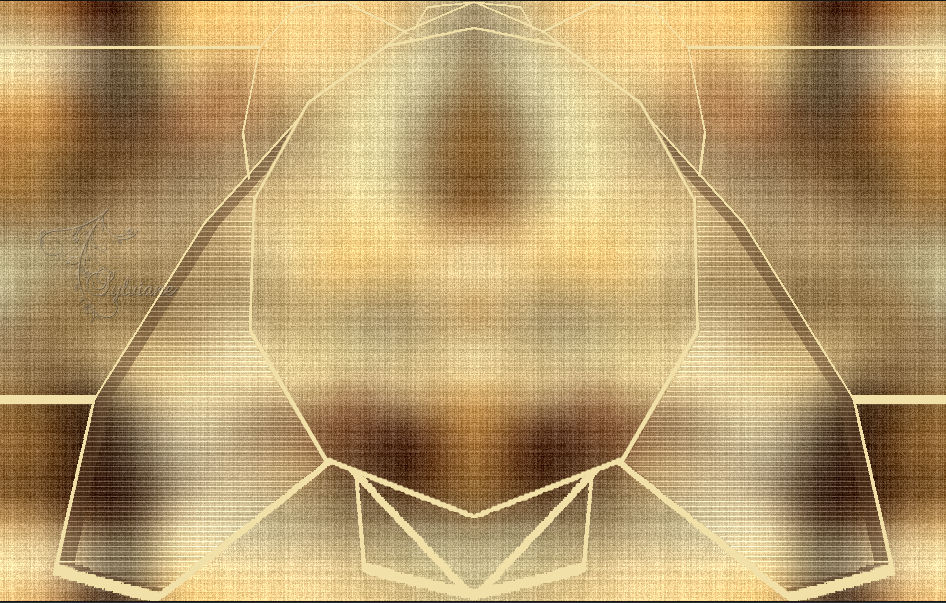
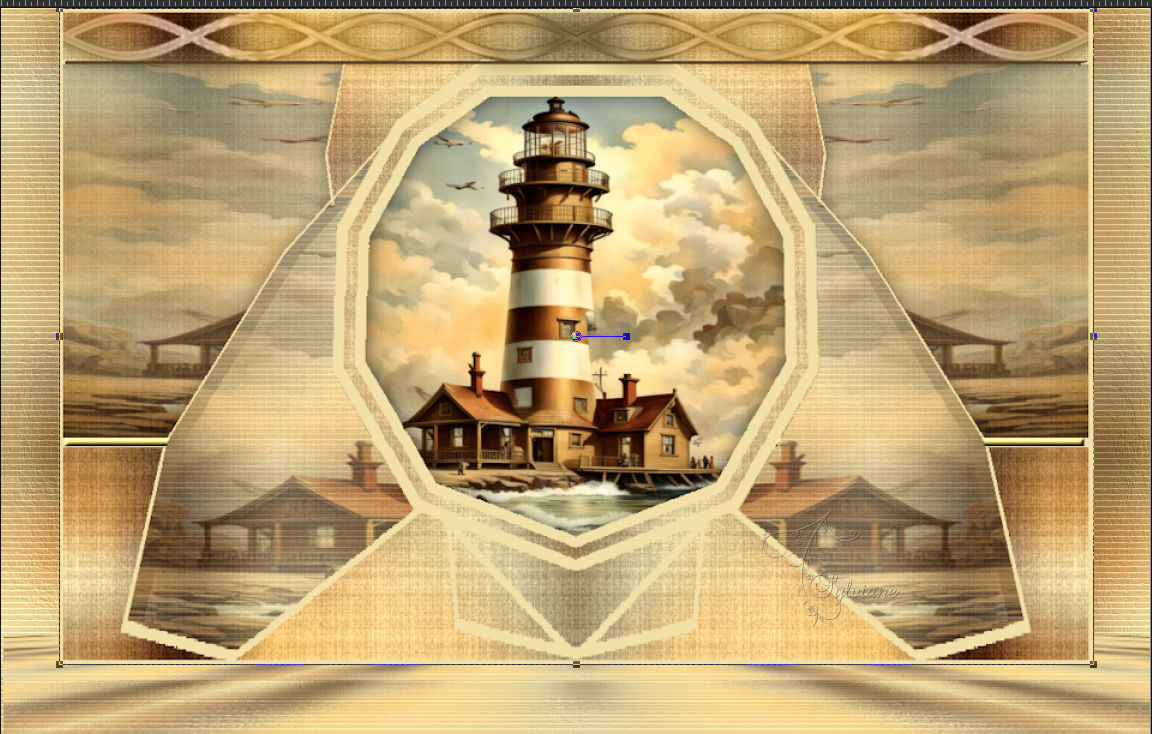
Which gives us this:

Selector tool (K on keyboard) enabled. Move the pointer over the middle center cursor
Edit as on my screenshot:

Layers – merge – merge down
6.
Still on the bottom layer (Raster 1).
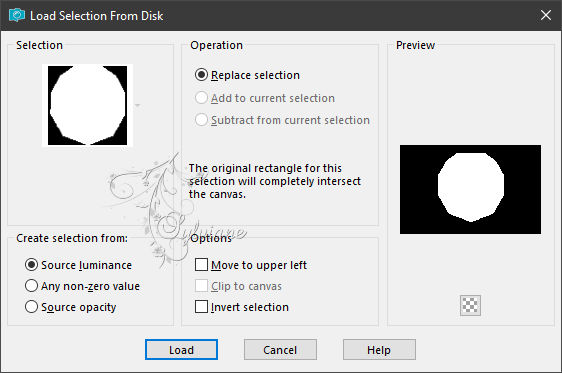
Selections - Load / Save - Load selection from disk - SELECTION 3 206 .PspSelection
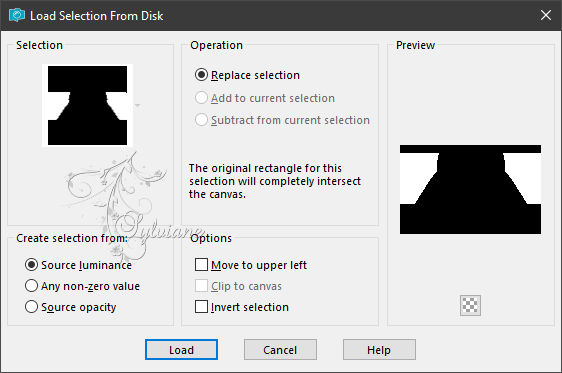
Selections – Promote selections to layer
Layers - New Raster Layer
Open 1899-advertisement-crooked-lighthouse-saloon-air-brush-smooth-mysterious-317953207.jpg
Edit - copy
Activate your work
Edit - paste into selection
Opacity of this layer between 60 and 70%
(60% for both versions)
Effects – reflection effects – rotating mirror
Selections - Invert
Effects - 3 D effects - Drop shadow
0 / 0 / 60 / 30 - color:#000000
Selections - select none
7.
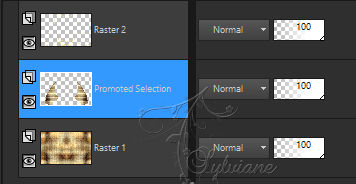
Our layers and tag:

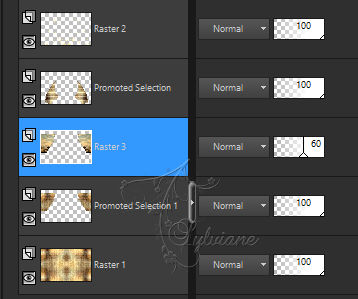
Still on raster 3
Activate Raster 2
Selections - Load / Save - Load selection from disk - SELECTION 4 206 .PspSelection
Erase OR Delete on Keyboard
Layers - New Raster Layer
Fill the selection with the color AVP or ARP
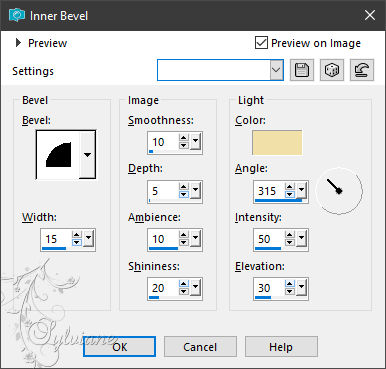
Effects – 3D effects – inner bevel
Selections - select none
Layers – arrange – move down(2x)
8.
Selections - Load / Save - Load selection from disk - SELECTION 5 206 .PspSelection
Layers - New Raster Layer
Layers - arrange – up (Between Raster 2 and Promoted Selection )
Fill the selection with the color AVP or ARP
Selection - modify - contract – 10px
Erase OR Delete on Keyboard
Selection - modify - contract – 10px
Fill the selection with the color AVP or ARP .
Selection - modify - contract – 10px
Erase OR Delete on keyboard
Layers - New Raster Layer
Layers – arrange – move down
Open 1899-advertisement-crooked-lighthouse-saloon-air-brush-smooth-mysterious-317953207.jpg
Edit - copy
Activate your work
Edit - paste into selection
Selections - Invert
Effects - 3 D effects - Drop shadow
0 / 0 / 60 / 30 – color:#000000
Selections - select none
9.
Our result... for the moment:

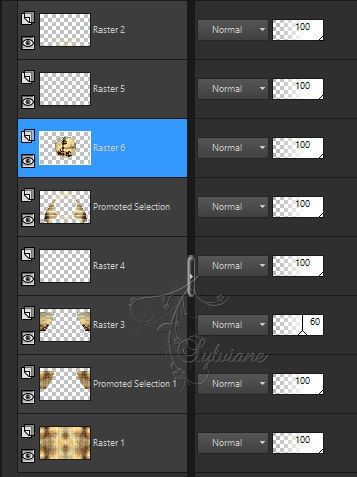
We are on Raster 6
Activate Raster 5
Layers – merge – merge down
Layers - New Raster Layer
Selections - Load / Save - Load selection from disk -SELECTION 1 206 .PspSelection
Open 1899-advertisement-crooked-lighthouse-saloon-air-brush-smooth-mysterious-317953207.jpg
Edit - copy
Activate your work
Edit - paste into selection
Effects – reflection effects – rotating mirror
Set the opacity of this layer between 45% and 55%. (45% for both versions) -
Layers – arrange – move down
Layers – merge – merge down
Selections - select none
10.
open DECO PERSO 2 206 FEVRIER 2024 SWEETY.png
Edit - Copy
Edit - Paste as new layer
Place as on my model:
Blend Mode :Luminance (legacy)
Effects - 3 D effects - Drop shadow
0 / 0 / 60 / 30 / Black OR AVP
Image - Add Borders – Symmetric – 4px - color AVP or ARP.
Layers - Duplicate
Image - Resize - 90%
No check mark on resize all layers
Activate Background
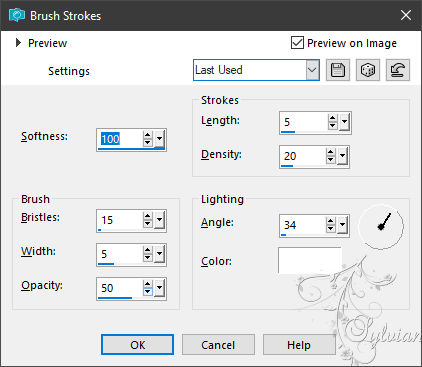
Effects – art media effects – brush strokes
Effects – plugin - Carolaine And Sensibility - CS Texture : as in point 3
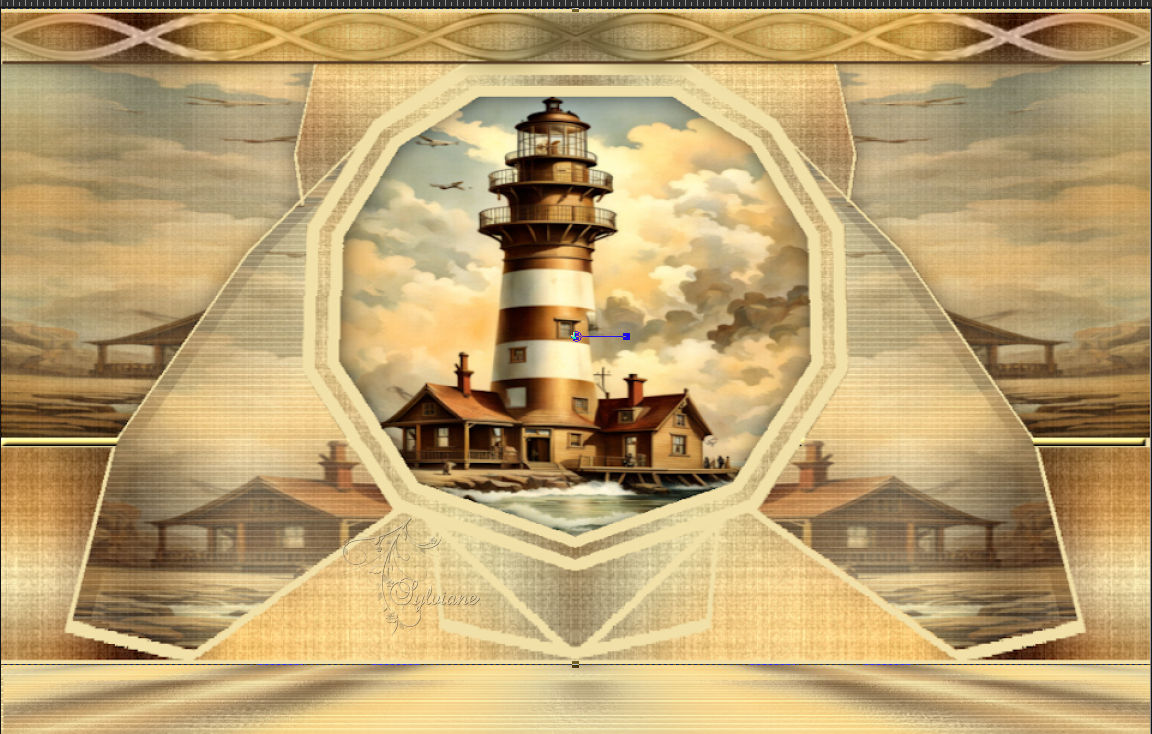
We have this:

11.
We're on the bottom layer (Background)
Selections - Load / Save - Load selection from disk - SELECTION 6 206 .PspSelection
Selections – Promote selections to layer
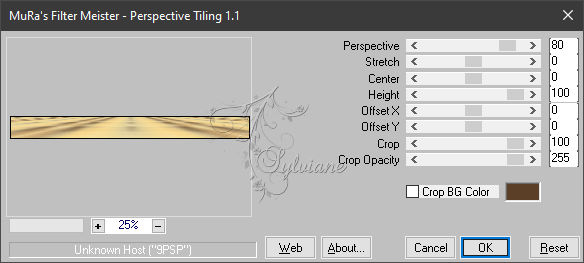
Effects– plugin - MuRa’s Meister - Perspective tiling - default
Selections - select none
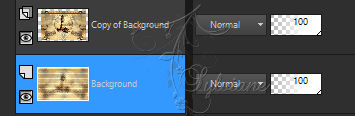
Activate Background
Edit - Copy
edit - paste as a new image (we need that for later)
12.
Activate Copy of Background
Effects - Image Effects – Offset

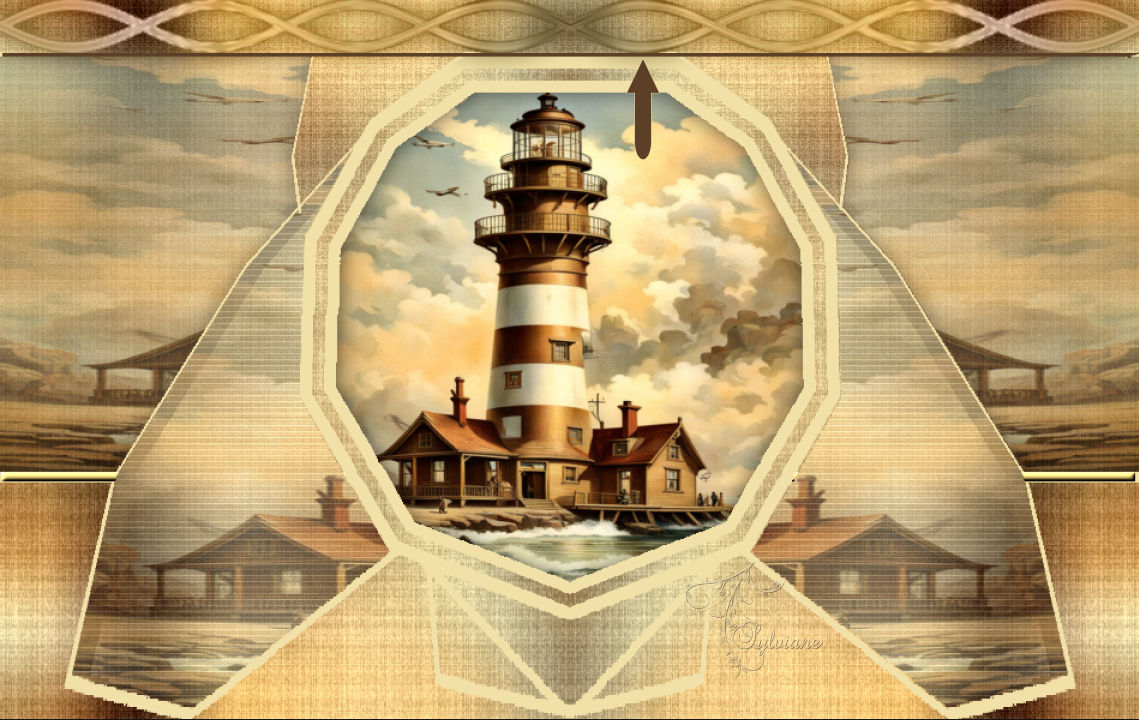
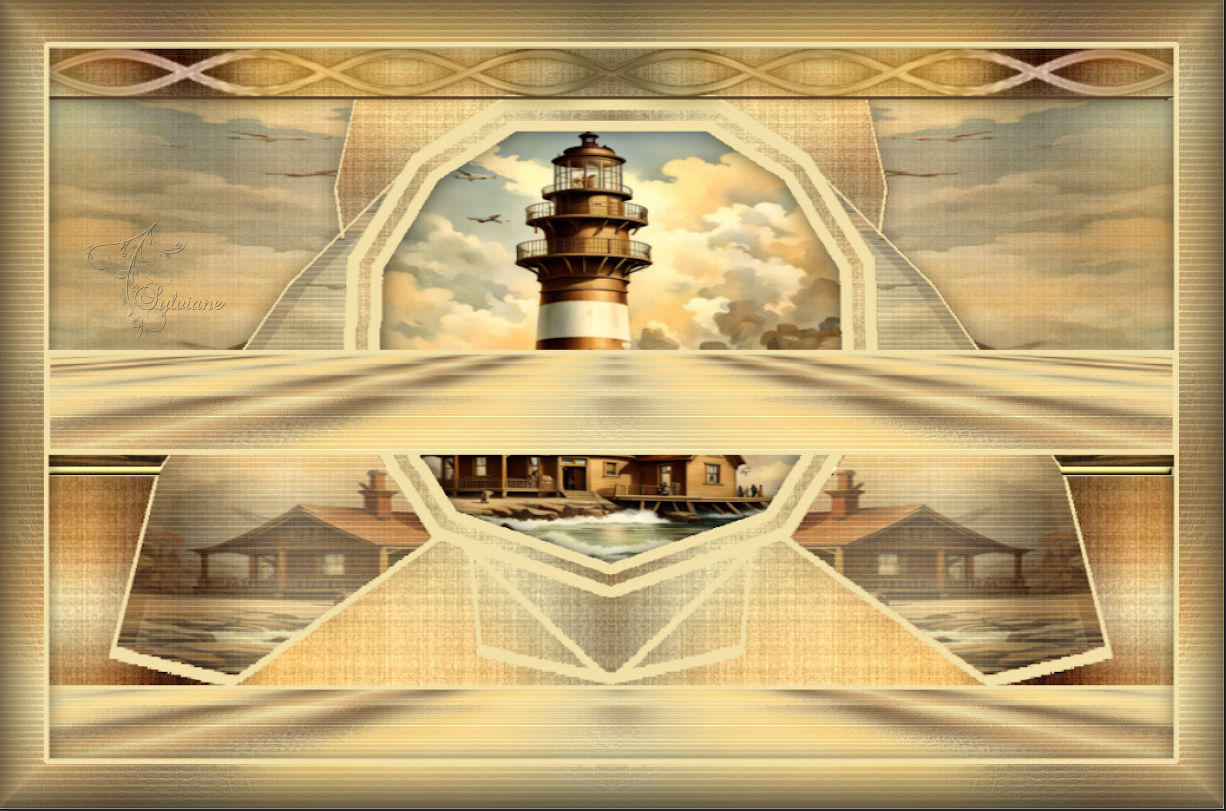
Then arrange as on my screenshot: (See screenshot)
After:
Activate Promoted Selection
Edit – Copy
edit - paste as a new image(we need that for later)
13.
Selection - Select All
Image - Add Borders – Symmetric - 40px (no matter the color)
Selections - Invert
Activate image from point 11
Edit – Copy
Edit - paste into selection
Effects – 3D effects - buttonize - dark color
Effects – reflection effects – rotating mirror
Effects - 3 D effects - Drop shadow
0 / 0 / 60 / 30 / Black or AVP
Selections – Invert
Selections - modify - select selection borders
Fill the selection with the color AVP or ARP
Selections - select none
14.
Open Activate the reserved image in step 12
Edit – copy
Edit - Paste as new layer
Selection - Select All
Selections – float
Selections – defloat
Selections - modify - select selection borders
Fill the selection with the color AVP or ARP -
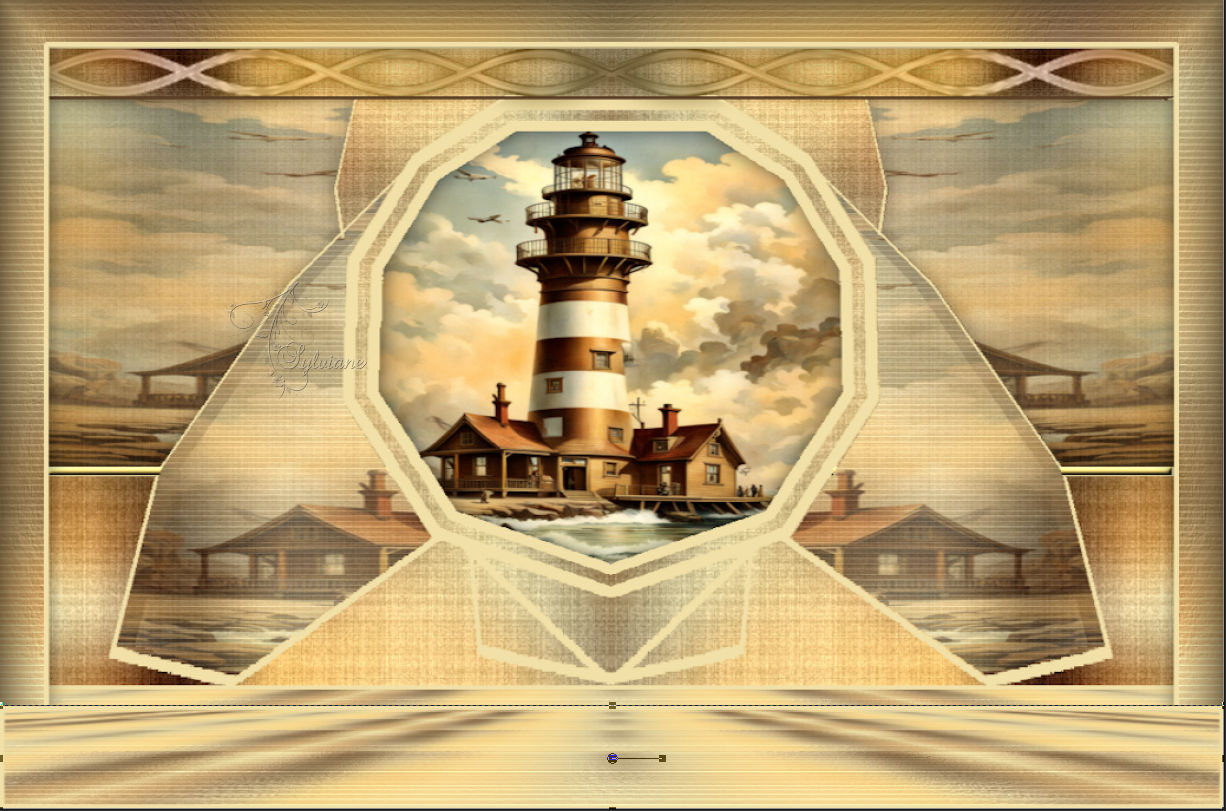
Arrange as on my screenshot:
After:
Activate Tool====>Magic wand====>Tolerance: 0 / feather : 50

Click in the empty part of the layer. Erase OR Delete on keyboard +/- 10 times -
Selection - Select None
15.
Open FEVRIER 2024 MADEMOISELLE MUGUET 21 02 24 SWEETY.png
Edit – Copy
Edit - Paste as new layer
Image - Mirror – mirror Horizontal
Image - Resize – 70%
No check mark on resize all layers
Open FEVRIER 2024 MADEMOISELLE MUGUET 21 02 24 SWEETY.png
Edit – Copy
Edit - Paste as new layer
Image - Resize – 40%
No check mark on resize all layers
Open WORDART 206 VERSION 1 FEVRIER 2024 SWEETY.png
Edit – Copy
Edit - Paste as new layer
place as in the example
16.
Layers - New Raster Layer
Fill with AVP color
Selection - Select All
Selection - modify - contract -5 px
DELETE or DELETE with keyboard.
Selection - Select None
Add your signature and mine if you wish
Layer – merge – merge all (flatten)
Resize to 950 pixels
Save as JPEG
Back
Copyright Translation 2024 by SvC-Design
------------------------------------------------------------------------------
Thanks to all who created